Showing posts with label Organization. Show all posts

Wednesday, November 19, 2014

Livingroom Update

It's been over 3 years since moving into our home and for the last 3 years I have struggled to find furniture that fits the space, provides ultimate comfort, and looks pretty. It seems I have always found cute but small couches, had too much or too little storage. After careful consideration, months of planning, and the advice of my husband, we finally updated the living area with a much bigger couch and better organization. Here's the new space:

The new couch, though double the size of our old couch, actually opens up my office, and defines the living area much better. My husband is super happy it's large and comfy and we all can lounge on it at once. We bought the couch over Veterans Day weekend and got no tax and 0% financing for 12months, which made me happy! The white TV stand we snagged for 40% off at ikea because it was a showroom display (score!) I sold all the old furniture on craigslist so my overall cost to redo the livingroom was really only $300 ;)

Here is the BEFORE:

Slightly less floor space BUT way more comfort/seating. And there's still plenty of space to play elsewhere for the kids. 

I think I love it now ;)

Wednesday, September 17, 2014

De-crust the Uncrustable {make ahead PBJ lunches for school}

Part of my organizing process coincides with my money saving techniques when it comes to the weekly lunches for my husband and my kids. I have to make things that can be made ahead and ready for the entire week, otherwise my weeks get to hectic and I know I would forget and end up missing lunch days. My daughter loves PBJs, and they have protein rich peanut butter, so I let her have one everyday. It makes her happy to bring a sack lunch, and she eats every strange and crazy thing I feed her for dinner, so I let her have this one. We tried the uncrustables, which are fantastic, easy, and fairly cheap. But I wanted to out-cheap them and DIY my own make ahead freezer PBJs. Heres the process:


Its as easy as it looks. Take a loaf of bread or two (I am using 100% whole wheat), some P and some J, make 20 or so sandwiches, zip lock them shut, freeze, enjoy later! If your worried about soggy bread, try spreading the P thinly on both sides and putting the J in the center of both slices.

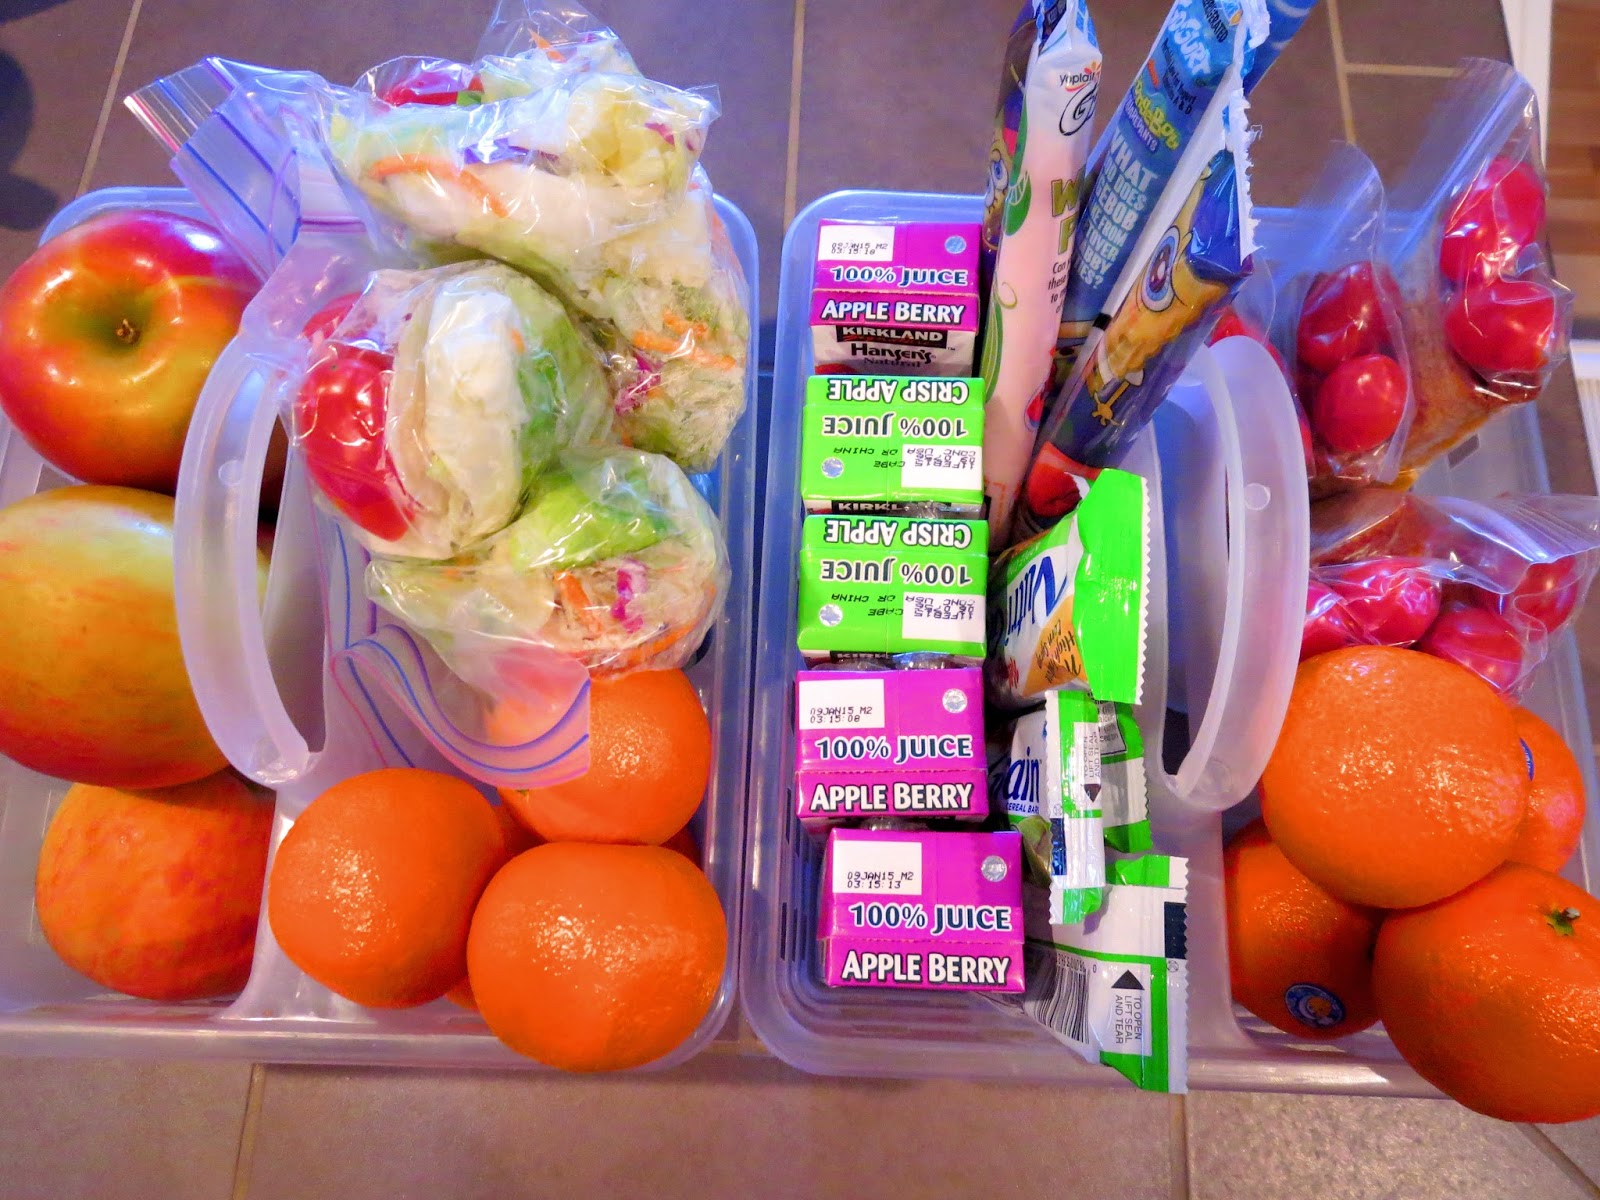
My husband gets sandwiches, rotisserie chicken from Costco (split into 5 meals), casseroles, etc. Both of them get a basket of sides/drinks that vary from week to week.


Uncrustables are around 50-60cents each. The cost to make them yourself is around 25cents per sandwich. Knowing your awesome and made your kids lunches from scratch (the easiest way possible), priceless!!

Thursday, August 14, 2014

Playroom in the Closet {30sf to play}


Hey friends! I have moved all my content to my new blog www.rainandpine.com

I have the full playroom in a closet post moved there as well! You can find it here: https://www.rainandpine.com/creating-a-playroom-in-a-closet/

Friday, May 30, 2014

Car Organization and Shopping with {MY FAVORITE} Thirty-One Bags

I wanted to share how I use Thirty-One Bags to organize my car. I have these bags for everything these days, and will show other ways I use them soon. Today is all about my car, and grocery shopping. Take a look!


Here is my shopping cart loaded into one "Fresh Market Thermal" bag.


This is the trunk of my small SUV with the third row up (notice its not a very large space). I have a Large Utility Tote to catch my smaller bags and items I take in the house after my errands. I keep this and the Fresh Market Thermal together in the trunk and use them daily. This keeps my car from having junk thrown about, and from spilling groceries (the Large Utility Tote holds paper bags upright or can be used to catch plastic bags and unbagged items as I have done today). Both fit even in a small trunk space!


Here is the 2nd row of seats, where my 2 children usually sit. They each have a Thirty One Beauty Bag being used to store their car fun items, and the diaper caddy (which just stays in the car until I need to refill it) sits between them.


My 8 year olds bag has books, puzzle books, colored pencils, a clip board, and her trinkets.


My 2 year olds bag has coloring books, touch and feel books, a doodle pad, a wooden magnetic puzzle, crayons and a clipboard. They don't strap down at the bottom so they can reach for their bag and pull it towards them to reach everything inside of it.


This Keep it Caddy by Thirty-One is the perfect diaper caddy! Inside I have a Thirty-One large thermal pouch where I keep snacks. Even when its fairly hot the chocolate z-bars don't melt! So its perfect to keep snacks the right temperature while in the car right there in my diaper caddy for easy access. Below are a couple photos of items I keep in my caddy.


Lets look back at the trunk space again. Here it is without any bags. It opens up and there you will find... MORE BAGS!


Another Large Utility Tote JUST IN CASE I NEED A HUGE BAG!! Maybe for a costco trip or muddy kids stuff. Did I mention these wash very easily and are thick and durable material?! Well, they are!


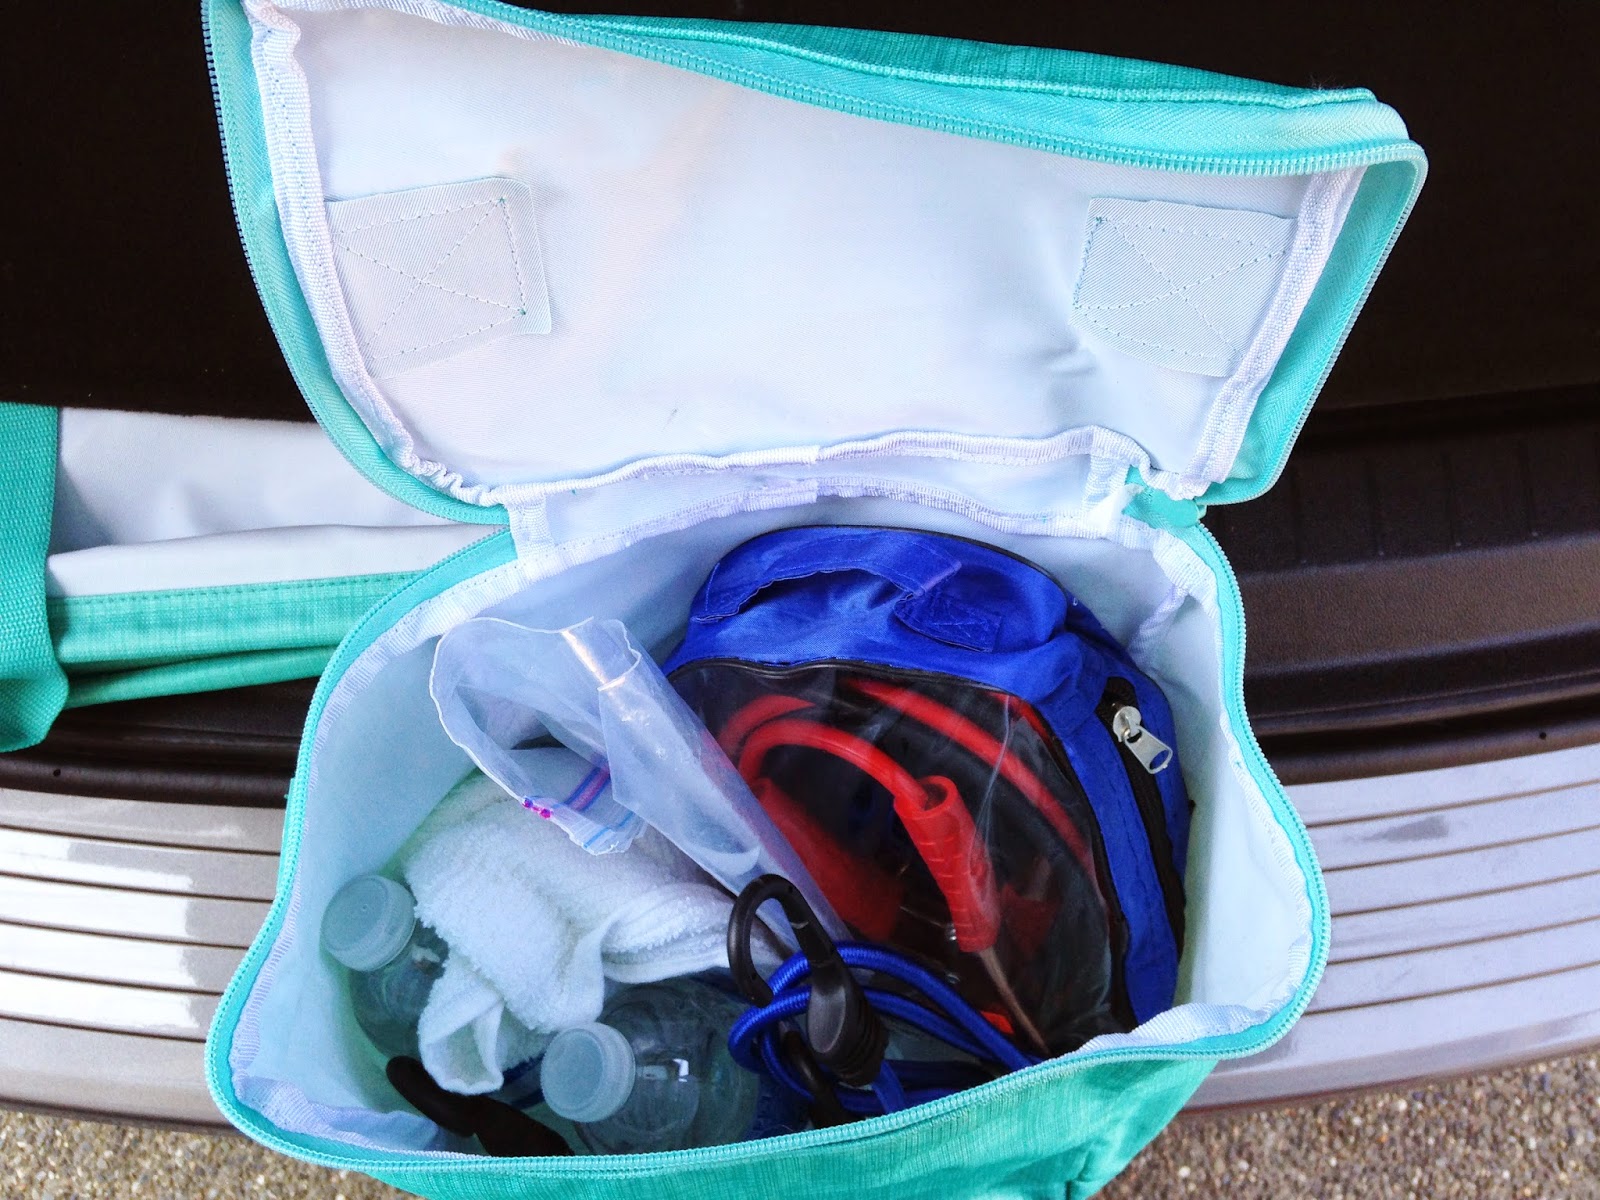
Under that flattened bag I keep another utility bag with emergency supplies (jumper cables, bungee cords, towels, and water).


This picture is to prove that my weak muscles and my 5'2" body can in fact carry these HEAVY, fully loaded bags when I need to take the items from the car to the house. The people at the registers can never believe I WANT them to pack that thermal FULL because of how HEAVY it gets. But I am the kind of person who will carry 10 plastic bags dangling off each finger just to avoid the dreaded second trip in the house. I prefer the one easy to carry heavy bag over the 10 very hard to carry heavy bags that break.


Fully loaded, ready to unload! And after 1 hour, the items are ICE COLD. No signs of melting or moisture on the milk containers at all!


Here's what I bought today. It all fit nice and neat, and there was room to spare!


I hope this helps some of you out there see that you CAN organize your car when you have kids and a busy on the go life. I don't sell these bags if you want to shop from my wonderful consultant, just leave a reply below.

Tuesday, May 20, 2014

Project Life Organization Tips {Ikea's Raskog Cart + SC Boxes}

I wanted to share how I use the Ikea Raskog Cart in my craft space. I wanted to fit the cart under my ikea desk, so I removed the wheels and added foam pads to protect my wood floor, and it glides easily from under my desk when I need to use it.


The top compartment has an Antonius divider and holds my current monthly kit items, which right now include Studio Calico, Gossamer Blue, and Take Ten. I have one spot for alpha and large embellishments, one for 4x6" cards, one for 3x4" cards, one for medium embellishments and one for small embellishments. Eventually, unused items will get stored in my larger storage system when I am done using the monthly kit and just have remnants leftover.

The second compartment holds my Studio Calico monthly kit boxes with additional embellishment storage. I use a small divider system for items where I have a small amount of each embellishment, or I want them separated very neatly by type and material. However items like enamel ephemera bits, labels, and overflow of PL themed cards need larger storage, so I store them in these kit boxes upright. I use washi tape as the box label because its easily removable if I need to change the label later.


Labels


Bits


Enamel (Notice how even though these are stored upright, everything stays how it should when I lay it down and open it. The plastic bags are melted beads, and they stay just like that when stored!)

The very bottom shelf is random right now. Whatever I need to put there I just put there. Maybe in the future I will designate a specific use for it. :)

Sunday, March 16, 2014

Bright & Fun Nursery-to-Toddler Bedroom

Yellow! It could work for a boy or girl, a nursery or a toddler room, it could work with blues or pinks. It makes me feel HAPPY. So I went for it and painted our baby's room yellow and came up with a bright and cheerful nursery-toddler space since our youngest moved into her own room right at 8 months.


This was the original set up for our 8 month old. We had the changing station on her dresser ($100 Ikea), an Ikea crib ($100), a toy chest from a consignment shop ($20), a very cute Octopus stuffed chair ($60 BabyStyle), a bright banner made from cardstock paper which I planned to use for her 1st birthday later that year, a cute valance from Ross ($4), Photo shelves from Ikea ($10-15ea), Tissue paper balls (Party store $6), The hanging net above the crib is also from Ikea, and I added artwork I created and framed them in Ikea plastic frames ($1-5ea).


I used white wood letters from the craft store ($2ea) and covered them in cardstock paper to create a fun pop of color on this wall.


This is a closeup of the banner I made out of cardstock paper. I layered 2 sizes on each flag to make very colorful.


I wrapped some frames in colorful wrapping paper, and I created quick art from tempura paint and framed in cheap Ikea frames. As Ashlyn gets older, these pieces will be replaced by her artwork framed on this shelf.


I have a thing for unique little toys and animals. I found this fun fabric bin from Target ($5).

The next few photos are from this week, a year after Ashyln first moved into her Nursery-Toddler bedroom. We added a fun bookshelf/doll house and now her room is full of toys, puzzles, and books. I also added some fun butterfly wall decals near her crib (a gift from a friend).


Ashlyn LOVES her room, and that's what matters most to me. PS, it usually looks like this (toys everywhere, her 5-10 blankets strewn about in her crib), which makes me feel like her room really IS hers, and not just a decorated space. It feels like a happy toddler space!

Monday, March 3, 2014

My Livingroom, Organized or Not?

This is our living room/family room/playroom. We store toys on the coffee table shelf and in the Ikea Expedit below the TV. What do you think, is this organized chaos or just chaos? PS this is a photo from the middle of the day after my toddler has made herself at home with her toys and while I am mid-project on my laptop. I wanted to capture my REAL life home in this picture, which I used in my Week 8 Project Life Album HERE.

Home sweet home :)

Monday, February 10, 2014

Nowhere to craft but HERE (how the kids craft in the diningroom SUCCESSFULLY)

Several rooms in my home MUST function in more than one way. Previously, I blogged about my craft space or "crafting behind the couch," where I shared how I took a small wall in my livingroom and created a functional craft space clearly separated from the livingroom. Today I will show you where my kids get to craft. Our home only has one family room/livingroom area, one small dining area, and just enough bedrooms for us all to sleep. We do not have a playroom or spare room anywhere in our house to do crafts or play. My solution was to use all the wall space in the home for shelves, shelves, shelves. In the dining room I put a buffet/kitchen island/sideboard/"whatever its called" in between the kitchen counter and our dishes hutch. Originally this was used to store junk, random rags and dishes, and knick knacks. I really wasn't using it well, and at the time I had my kids crafts in huge boxes under my desk. It was difficult to get to, to keep organized, and to clean up, so I never wanted to get the crafts out even though Emily LIVES to craft. This random storage thing would end becoming the PERFECT craft station for my kids. The drawers are large enough to hold cups of organized smaller items such as beads and pom pom balls. The dual layer of shelves allows me to store all the paper, paints, and awkward shaped crafty items in organized, labeled boxes. And the top, well that holds all the many, many books and kits and projects we could ever dream of having out. It is SO much easier for Emily to get to all her projects with them out on display, rather than digging them out of boxes and bags. All her educational books, Girl Scouts projects, American Girl projects, and activity books fit. Ashlyn's legoes, leapster, and other toddler aged toys that I want kept out of her reach also fit well up there.


This is the craft center, which fits well between the dish hutch and the kitchen counter.


The drawers are spacious enough to allow me to organize to fit my needs.


I found these yellow cups at Ikea. They are just the right height for the drawers and are used to sort pom poms and other small multi-use crafty items.


This spinning organizer from Michaels Craft Store ended up being the perfect addition to our craft center, making it very easy to transfer to the diningroom table for the kids to use, and it holds all their markers, colored pencils, scissors, paint brushes, and crayons. The crayons are on a collapsing Crayola tower which fits on top of this storage unit perfectly! Under the crayons is where we keep the glue.


I also display the kids art on the wall above their craft area using Ikea curtain wire.


A closeup of the craft center.


The craft center storage unit, the storage boxes, and the the curtain wire (for displaying art) are all products from Ikea.

The white spinning storage unit and the storage unit with 4 shelves on top of the craft center are both from Michaels Craft Store.

Monday, February 3, 2014

Thirty-One Hang-Up Home Organizer

I love organizing. I organize my drawers, my purse, my house, my closet, and even my paperwork. Something I had yet to organize was the massive amount of information coming and going from Emily's school/activities/friends/LIFE. I needed something that made it easy for ME to remember everything. I am also VERY visual. If I can't see something, I will probably forget about it or put it off until the last minute (or worse). Enter Thirty-One gifts. Never in my life would I thought I would HAPPILY spend hundreds of dollars on BAGS. But I won't get into my obsession with these bags right now. I will just focus on the one item in their fantastic line-up that solved the Emily's never-ending stack of paperwork/how can I remember it ALL dilemma. The solution is the thirty-one hang up home organizer. It is the PERFECT (for me) all-in-one command center for "The Kids." Here is my organizer:


This organizer has 5 main sections. The top left has a strip of fabric that allows you to hang up your calendar of choice. I put our school calender here, and it easily fits the 2 months layout our calendar has. This space is large enough to fit just about any paper flip calendar.

The top right section is a vertical dry-erase see-through pocket that fits 8 1/2" x 11" paper. This is where I created a weekly activity chart for my girls. I could easily edit this and add more children later. This gives me and Emily a good visual for what we are doing each week. I use this space to write in "free time" or "work on personal projects." Sometimes we forget about all the great kits and projects we start, so I use this to remind us both that Emily needs time to work on them. Some projects I designate time to include Little Passports, American Girl crafts, and working in her learning/activity books.


The center section has a couple small pockets you could use for just about anything, and another dry-erase see-through pocket that fits 8 1/2" x 11" paper (horizontal). I used this pocket for the annual school calendar so I have a fast at a glace view of our 1/2 days and no school days.

The bottom left and bottom right sections both have 2 pockets each. You could use these for just about anything you need! Right now I am using the top left pocket for Emily's activities, and the top right pocket for paperwork from Emily's school/classroom. I am not using the bottom pockets; instead I am clipping the monthly lunch menu and the monthly PTA calendar to the front so I can easily see both.


As of now I only have one child in school, but once both girls are in school, I will add tabs n the pockets for each girls activities and classrooms. You could use this for several children by adding multiple tabs in the pockets. The rest of the organizer is great for the district information that would be relevant to multiple children across multiple grades and schools. You can create checklists/chore lists/activity lists to put in the dry-erase see-through pockets that suit your individual needs.

I have this hung in our entry way and use it everyday. The fabric is thick and durable. The fabric cleans easily. It looks so pretty with the rest of the turquoise items in my home. If you want to buy your own Thirty-One Hang-Up Home Organizer visit thirty-one online and find a consultant near you to place an order. I almost forgot to mention, these (like all their products), come in several trendy colors, which change every season. If you see a color you love I recommend you buy it, it may disappear next season!

Wednesday, January 29, 2014

Crafting behind the couch

I am slightly obsessed with organizing. Even if something seems completely organized, I will tear it apart and start over if I am bored. Here are some pictures of how I have turned my small house into a big home. With just 3 bedrooms and 2 kids, here is how I gave myself a craft space and my kids a playroom and art space, and how I put everything in its place and find every place something to put in it!

My Craft Room {A.K.A. "crafting behind the couch"}


The 10 foot wall where the couch could go, has become my craft space, making the livingroom space slighly smaller by pushing the couch towards the TV.

Two IKEA table tops are connected, with IKEA shelving to the ceiling, a desk under the window for my laptop, and a mixture of bins, shelves, cubbies and more offer enough space for me to contain my crafts and my paperwork.


This is how I store my Project Life cards on my desk top for quick and easy scrapping.


I love Thickers alpha! I hung a $1 Target grey basket on my wall and put all my alpha, including my Thickers, in this basket so I can quickly find and use the alpha I need. Each alpha is in a 6"x12" zip baggie (found on eBay).


I keep all the rest of my embellishments, paper, stickers, stamps, etc under my computer desk in these 2 storage things, which I bought from JoAnnes.


I store my wood stamps and stamp pads in 2 drawers. My clear stamps are in a stamp storage binder on my desktop.

I use $1 plastic bins and recycle the mini kit PL boxes (cut off the lids) to separate all the little things I love to use to embellish in the drawers that do not already have dividers. The next photos show how I use the divided drawers.


I like to add fun, inspirational pretty elements to make my space really feel "mine."

I actually LOVE having my craft space in the living area because I can be around my kids all day and craft in between cooking and cleaning and being with the kids. I can jump up mid-scrap and toss food in the oven and go back to scrapping while the food cooks. I can jump up and dance with my toddler for her favorie song in the playroom (our livingroom on the other side of the couch) mid-stamping and come right back. It works out perfect for me.

Here's a quick picture of the rest of the living area. In another post I show how my dining room is also the children's crafty space HERE.


It's a small but cozy home and it works for us!