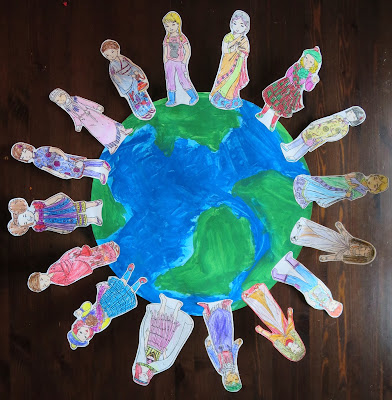
Are your Girl Scouts ready for World Thinking Day? Each year on February 22, World Thinking Day, girls participate in activities and projects with global themes to honor their sister Girl Guides and Girl Scouts in other countries. Our troop created this fun project last year.
We cut a large circle from poster paper from the $1 store, lightly drew the country outlines, and let our Daisy Scouts paint the world. We had each girl color in a girl from around the world with THESE FREE PRINTABLES and glued them around the edge to signify that we are "sisters to every Girl Scout" around the world. During the project we discussed the Earth and our sister Girl Scouts in while working on earning Violet's petal (which is "Being a Sister to Every Girl Scout").
The girls had a lot of fun with this project and the product turned out beautiful. I display this in my home next to my daughter's other masterpieces.
My life as a happy and crafty, frugal yet fun, wife and mom of two. I seriously don't know what I am doing, but I'm having fun doing it.
Wednesday, January 29, 2014
Little Passports educational kit club for Kids
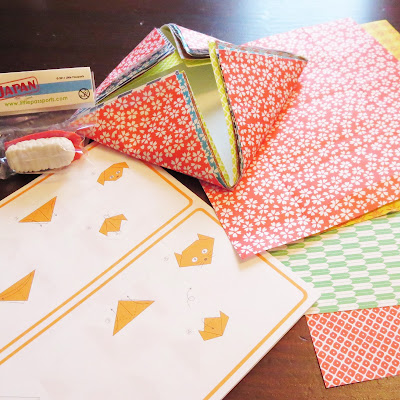
I recently signed Emily up for a monthly kit club that sends out a package of educational materials focusing on one country per month. We have received 2 months (Brazil and Japan) so far and I have to say I LOVE it. True, I could print out things myself each month, but I would forget and it would become another great idea that is buried in the household to-dos. With the kit, every month Emily looks for her package in the mail, then happily tears it open and gets to work right away doing the crosswords and activities that come in the kit. When shes finished, she goes online with her unique code and reads all about that months country. We covered an old journal in kraft paper and staple in each months worksheets/postcards. Emily uses the journal each month to record additional things shes learned or to doodle something she found in her research. (We are huge fans of journaling in our home).
Click HERE to start a membership for the little learner in your life.
I love their "Monthly Plan" which is only $13.95/month including shipping, and you can cancel ANYTIME.
Little Passports also offers annual plans and has both the World Edition (what we have) and a US Edition to choose from (or get both!).
Crafting behind the couch
I am slightly obsessed with organizing. Even if something seems completely organized, I will tear it apart and start over if I am bored. Here are some pictures of how I have turned my small house into a big home. With just 3 bedrooms and 2 kids, here is how I gave myself a craft space and my kids a playroom and art space, and how I put everything in its place and find every place something to put in it!
My Craft Room {A.K.A. "crafting behind the couch"}
The 10 foot wall where the couch could go, has become my craft space, making the livingroom space slighly smaller by pushing the couch towards the TV.
My Craft Room {A.K.A. "crafting behind the couch"}
The 10 foot wall where the couch could go, has become my craft space, making the livingroom space slighly smaller by pushing the couch towards the TV.
Two IKEA table tops are connected, with IKEA shelving to the ceiling, a desk under the window for my laptop, and a mixture of bins, shelves, cubbies and more offer enough space for me to contain my crafts and my paperwork.

I love Thickers alpha! I hung a $1 Target grey basket on my wall and put all my alpha, including my Thickers, in this basket so I can quickly find and use the alpha I need. Each alpha is in a 6"x12" zip baggie (found on eBay).

I keep all the rest of my embellishments, paper, stickers, stamps, etc under my computer desk in these 2 storage things, which I bought from JoAnnes.

I store my wood stamps and stamp pads in 2 drawers. My clear stamps are in a stamp storage binder on my desktop.

I use $1 plastic bins and recycle the mini kit PL boxes (cut off the lids) to separate all the little things I love to use to embellish in the drawers that do not already have dividers. The next photos show how I use the divided drawers.
I actually LOVE having my craft space in the living area because I can be around my kids all day and craft in between cooking and cleaning and being with the kids. I can jump up mid-scrap and toss food in the oven and go back to scrapping while the food cooks. I can jump up and dance with my toddler for her favorie song in the playroom (our livingroom on the other side of the couch) mid-stamping and come right back. It works out perfect for me.
Here's a quick picture of the rest of the living area. In another post I show how my dining room is also the children's crafty space HERE.

Tuesday, January 28, 2014
2014 Project Life {WEEKS 1-4}
For the first few weeks I am using PicMonkey to make collages to fit in lots of photos and details. You can find my easy to follow PicMonkey collage tutorial HERE. I use Photoshop Elements 9 to add digital stamps and to edit each photo. I use a variety of kits from Becky Higgins and We R Memory Keepers, and wood veneer embellishments from Studio Calico and a variety of Thickers stickers as well as random chipboard accents.

{WEEK 1}
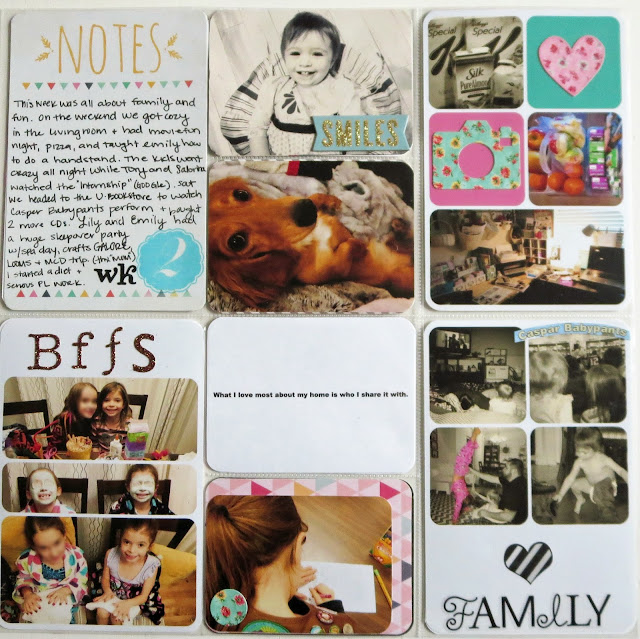
I am trying to capture the "little" things, and plan to take close-ups like these of my kids playing with the things they love.

I couldn't find any quotes in my cards that I wanted to use this week, so I made up a stack of black and white quotes and sayings and used one this week, which reads "what I love most about my home is who I share it with."
You can purchase a printable set of these quote/sayings cards in my Etsy shop SOLD BY SABRINA
Tory brought me flowers this week. I cut the butterfly from the wrapping and glued it over the photo of him with the flowers. I glued a 3x4" card over the 4x6" title card to have more room for journaling.
The "enjoy everyday" card is a 3x4" card wrapped in a foil candy wrapper, stamped with black ink. I embellished my cards this week with a cork "!" and a cork arrow from Studio Calico, a Heidi Swapp plastic arrow and a fun arrow puffy sticker. I also used a combination of digital and traditional stamping and glittery stickers on this weeks spread. The Seahawks photo is of the game-winning catch by Sherman at the NFC championship game which we {the Seahawks} won on Sunday {I found this game changing photo online and used it since it sparked the biggest emotion in us while we watched the game}.

{WEEK 1}
I am trying to capture the "little" things, and plan to take close-ups like these of my kids playing with the things they love.

I couldn't find any quotes in my cards that I wanted to use this week, so I made up a stack of black and white quotes and sayings and used one this week, which reads "what I love most about my home is who I share it with."
You can purchase a printable set of these quote/sayings cards in my Etsy shop SOLD BY SABRINA
Tory brought me flowers this week. I cut the butterfly from the wrapping and glued it over the photo of him with the flowers. I glued a 3x4" card over the 4x6" title card to have more room for journaling.
The "enjoy everyday" card is a 3x4" card wrapped in a foil candy wrapper, stamped with black ink. I embellished my cards this week with a cork "!" and a cork arrow from Studio Calico, a Heidi Swapp plastic arrow and a fun arrow puffy sticker. I also used a combination of digital and traditional stamping and glittery stickers on this weeks spread. The Seahawks photo is of the game-winning catch by Sherman at the NFC championship game which we {the Seahawks} won on Sunday {I found this game changing photo online and used it since it sparked the biggest emotion in us while we watched the game}.
2014 Project Life {Title Page}
Last year I discovered Project Life, the phenomenon known as pocket scrapbooking. I fell in love. I had tried my hand at scrapbooking for years. My first album I created in high school. The task was so daunting, however, I would neglect to keep up all year and in the summer I would sit down for a 24 cram-like session and do a whole year in one long night, only capturing the major highlights of the year. I have continued with this method for some years, until a couple years ago when I stopped trying all-together and just started piling photos and keepsakes in boxes, hoping eventually I would get motivated to DO something with it all. Then I met Project Life, and spent summer of 2013 going back through my partial albums and boxes of photos and I married them together in one, beautiful, giant album of my "adult" life. I went back to the birth of my second child in 2012 and put our family vacations and highlights in in more detail thanks to the journaling cards I had to now use. See, I have this fear of 1/2 completed things. If I can't finish it, I might just avoid it like the plague. Which is what I had been doing for all these years with scrapbooking. I wanted to do it. But the thought of trying to put a dent in the backlog brought on the more prominent thought of just giving up (besides, who was ever going to look at these albums anyways, right?) This year, being caught up (mostly) on the last 7 years of my "adult" life, I have decided (happily) to start doing weekly pages in my Project Life Album. I will try to post a photo of each week, and share what products I used and what techniques I tried. Project Life makes me happy, so I am happy to share it with you.
Subscribe to:
Comments (Atom)


